Showing posts with label Photography. Show all posts

Thursday, February 26, 2015

Different Camera Angles

Movements and camera angles are combined in order to create a sequence of images, similar to words, word order and punctuation combined so as to provide a meaning. Camera angle is the relationship between the camera and the object being photographed. 

5 Camera Angles
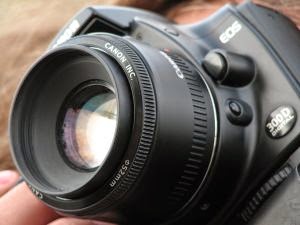

Taking A Photo
  1. Bird’s-Eye View – This will show a scene from directly overhead. This shot will put the audience in a godlike position which is looking down on the action. Did you know that Hitchcock and his admirers are fond of this style of shot?
  2. High Angle – The camera is elevated above the action by using a crane in order to give a general overview. This is not so extreme as opposed to the bird’s-eye view. This angle will make the object photographed seem smaller. The objects actually are being swallowed up by their setting. 
  3. Eye Level – This is considered a fairly neutral shot where the camera is positioned as if the human is actually observing a scene. The camera is usually placed at about 5-6 feet above the ground.
  4. Low Angle – This is the best shot for short subjects as this increase height. Also, it gives a sense of speeded motion. Its background just tends to be the ceiling or sky.
  5. Canted or Oblique Angle – The camera will be tilted in order to suggest imbalance, instability and transition. This is oftentimes used to suggest a point-of-view.

Trivia Info Resource: cherishyouportraits.com 

Wednesday, February 11, 2015

Four Ways To Improve Your Landscape Photos Using Photoshop


Here are four simple techniques that you can implement to come up with impressive landscape photographs.
  1.  To be able to able to present a stunning photo of a sunset you must straighten your horizon. You can correct a crooked horizon in Photoshop by opening the image and click on the following: View > Show > Grid to bring up the grid lines that you can use to guide your horizon line. Using the transform tool (CTL + T), rotate the image until your horizon is lined up properly. To finish, crop out the uneven edges and then put the grid away by pressing CTRL + H.
  2. To make your landscape photo aesthetically pleasing, make the horizon off-center. This should be utilized whenever possible. If the horizon is very close to the center of the image, you can correct this by using the crop tool to get rid of at least half of the sky to make the balance of the photo on the bottom.
  3. Follow certain guidelines when looking at a photo. Under the “rule of thirds”, you need to visualize your photo as having two vertical and horizontal lines that divide the photo into thirds. Crop out bits of some areas of the photo to make the horizon or other important line in your photo lie along one of the horizontal lines, while the other focal points should either lie along any of the lines or to the point where they meet. This will create a visually stimulating image that allows the eyes to drift across the whole image.
  4. Use Photoshop to easily add the effects of photo filters to your images. You can simply click on the appropriate icon on your adjustment palette to add a Photo Filter adjustment layer to your image.


To know how Photoshop was developed, read this post.

Sunday, January 18, 2015

A Look Into The Origins Of Photoshop

trusted providers of Photoshop courses
Many people think that one of the most popular and widely used applications, Photoshop, was created and developed by Adobe. However, this is not true: Photoshop was conceived and is the result of all the hard work of two brothers: Thomas and John Knoll.

Early Beginnings Of Photoshop

John took an early interest in photography and soon started developing his film in his father’s darkroom. He soon began developing color prints – an intricate process compared to black and white film development back then. By learning to manipulate the color and exposure of the photographs he developed, John would acquire the skills that would later be applied in Photoshop. John was also passionate about programming and he used his father’s early Apple II+ and Macintosh for research and honing his skills. John later joined Industrial Light and Magic where he was able to apply his hobby to his career.

John’s brother, Thomas, while taking up his PhD, Thomas bought a Mac Plus to work on his thesis. Unfortunately, unlike some of the costlier home computers of the time the Mac Plus was not capable of displaying images in color or grayscale. With the goal of using his Mac for his research, Thomas wrote a program called Display that allowed him to display grayscale images through dithering on the 1-bit black and white display. Display did not have a GUI, though; instead, it used a C Shell-esque command line interface. The program did nothing but display color and grayscale images on the Mac Plus through dithering.

John then tried Thomas’ program at Industrial Light and Magic and was very impressed by it. John then encouraged Thomas to turn the program into a true image editor that could permit people to manipulate digital images just like they would in the dark room and soon, the brothers started collaborating on Display’s successor: Photoshop.

Info source: www.cherishartz.com